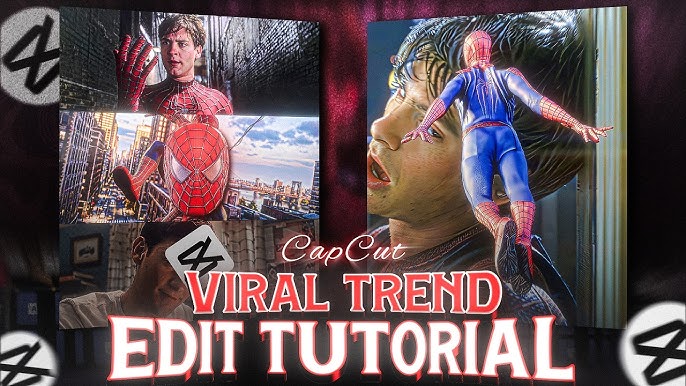

Video editing has become an essential skill for anyone creating content for TikTok, Instagram Reels, YouTube Shorts, Facebook, or other social media platforms. Among the many editing applications available today, CapCut has become a popular choice because it combines powerful editing tools with a simple and beginner-friendly interface.
If you want to learn the CapCut new full trending editing tutorial, this guide will walk you through the complete process. From importing your clips and creating smooth transitions to adding text, effects, music, and professional color adjustments, you can follow these steps to create engaging trending videos.
What Is CapCut?
CapCut is a video editing application designed for both beginners and experienced creators. It provides tools for cutting videos, adding music, creating transitions, applying visual effects, adjusting colors, adding captions, and producing content suitable for different social media platforms.
One of the reasons CapCut editing has become popular is that you can create attractive videos without needing advanced professional editing software. With the right combination of timing, effects, sound, and transitions, even a simple mobile recording can become an engaging short-form video.
Why CapCut Trending Edits Are So Popular
Trending videos usually have several elements that immediately capture the viewer’s attention. Fast pacing, synchronized music, creative transitions, animated text, zoom effects, and well-timed cuts are commonly used in short-form content.
CapCut makes it relatively easy to combine these elements in one project. However, using every effect available is not always the best approach. Professional-looking editing is often about choosing a few effects and using them at the right moment.
A good trending edit should feel smooth rather than overloaded.
Step 1: Start a New CapCut Project
Open CapCut and select the option to create a new project. Choose the photos or video clips you want to use.
Before beginning the edit, decide what type of video you want to create. For example, you might make:
- A cinematic short video
- A photo montage
- A travel reel
- A fashion edit
- A motivational video
- A beat-sync edit
- A TikTok or Instagram Reel
Selecting a style before editing makes it easier to choose suitable music, transitions, text, and effects.
Step 2: Arrange and Trim Your Clips
Once your media has been imported, place the clips on the timeline in the order you want them to appear.
Remove unnecessary sections from every clip. Short-form videos usually work better when there is little wasted time between important moments.
Use the split tool to divide a clip into smaller sections. You can then delete unwanted portions or rearrange individual sections.
A useful technique is to cut your footage according to the rhythm of your background music. This creates a more energetic and synchronized result.
Step 3: Add Trending Music
Music can dramatically change the mood of a video. Choose an audio track that matches the style and pace of your content.
After adding the music, listen carefully to its beat. Identify noticeable beats or changes in the song and place cuts or transitions around those points.
For example, if the music has a strong beat every few seconds, you can switch between clips on those beats. This technique is commonly known as beat synchronization.
For videos intended for public platforms, also pay attention to music licensing and the platform’s available audio library.
Step 4: Create Beat-Sync Transitions
Transitions are one of the most recognizable parts of many trending CapCut edits.
Instead of adding a different transition between every clip, choose a consistent editing style. Simple transitions can often look more professional than excessive effects.
Some popular approaches include:
- Quick zoom transitions
- Motion-based transitions
- Flash transitions
- Blur transitions
- Spin effects
- Camera-style movements
- Match cuts
The key is timing. A transition should support the movement or beat of the video instead of distracting from the main subject.
Step 5: Use Keyframes for Smooth Motion
Keyframes are an important tool for creating custom movement.
A keyframe tells CapCut where an element should be positioned, scaled, or adjusted at a particular point in time. By placing multiple keyframes, you can create controlled movement between those points.
For example, you can begin with a normal-sized image and gradually zoom toward the subject. You can also move an image from one side of the screen to another.
For a modern trending style, try using subtle zoom-ins and zoom-outs rather than extremely fast movements. Smooth motion often gives a more cinematic appearance.
Step 6: Add Text and Captions
Text can make your video easier to understand and can also improve viewer engagement.
Keep important text short. Instead of placing a complete paragraph on the screen, use short phrases that viewers can read quickly.
You can experiment with:
- Bold titles
- Animated captions
- Minimal subtitles
- Highlighted keywords
- Different font sizes
- Text entrance and exit animations
Make sure your text has enough contrast with the background. Avoid placing important words where they may be covered by social media interface buttons.
Step 7: Apply Effects Carefully
CapCut includes many visual effects that can transform the appearance of your footage. Effects can be useful for creating energy and matching the style of a trend.
However, adding too many effects can make a video look messy.
For example, you might use a brief flash effect when the music reaches a major beat, followed by a clean transition into the next clip. Similarly, a subtle blur can help create a smooth movement between scenes.
Think of effects as accents rather than the main content of your video.
Step 8: Improve the Color
Color adjustment is another important part of a professional-looking edit.
You can adjust settings such as brightness, contrast, saturation, highlights, shadows, temperature, and sharpness.
For a cinematic appearance, you might slightly increase contrast while controlling highlights and shadows. For a bright social media video, a cleaner and more vibrant adjustment may work better.
Avoid making skin tones look unnatural. A good color grade should improve the original footage without making it look artificial.
Step 9: Add Sound Effects
Background music is only one part of good audio editing. Small sound effects can make transitions and movements feel more impactful.
For example, a whoosh sound can accompany a fast transition, while a click or pop can emphasize text appearing on screen.
Keep sound effects balanced. If they are louder than the main audio, they can become distracting.
Step 10: Make the Video Match the Platform
Before exporting, check the video’s aspect ratio and resolution.
For vertical short-form content, a 9:16 format is commonly used. This format works well for platforms designed around vertical videos.
Also check the entire video from beginning to end. Look for:
- Unnecessary pauses
- Poorly timed cuts
- Spelling mistakes
- Text outside the safe area
- Sudden audio changes
- Excessive effects
- Low-quality clips
A final review can make a significant difference.
Advanced CapCut Editing Tips
Once you understand the basic workflow, you can experiment with more advanced techniques.
Use Speed Changes
Speed adjustments can create dramatic moments. You can slow down an important shot and then quickly return to normal speed when the beat changes.
Combine Multiple Layers
Overlay videos, images, text, and effects to create a more complex composition. Layering is especially useful for promotional videos and cinematic edits.
Experiment With Masking
Masking can help hide or reveal parts of a video. It can be used creatively for transitions and layered compositions.
Use Consistent Editing
Developing a recognizable style can make your videos easier to identify. You might consistently use a particular text style, transition speed, color treatment, or caption format.
Common Mistakes to Avoid
Many beginners believe that a trending edit requires dozens of effects. In reality, excessive editing can reduce the quality of the final video.
Avoid making transitions too long, using unreadable fonts, increasing saturation excessively, adding unnecessary stickers, or placing too much text on the screen.
Another common mistake is ignoring the first few seconds. Your opening should quickly communicate why viewers should continue watching.
How to Make Your CapCut Videos More Engaging
The best editing technique depends on the content itself. Start with a strong opening shot, remove unnecessary footage, synchronize important cuts with audio, and use visual movement to maintain attention.
You should also think about storytelling. Even a 15-second video can have a beginning, middle, and ending.
For example, start with an attention-grabbing scene, show the main action or transformation, and finish with a satisfying final shot.
Conclusion
Learning the CapCut new full trending editing tutorial can help beginners create more polished and engaging social media videos. The most important skills are not simply adding effects but understanding timing, music synchronization, transitions, keyframes, text, sound, and color.
Start with simple edits and gradually introduce more advanced techniques. Focus on clean cuts, smooth movement, readable captions, and appropriate effects. With regular practice, you can develop your own editing style and produce videos that look creative without becoming unnecessarily complicated.
Try On This Template